Introducing...Miss Pug!


This blog will be ala Weddingbee style where the blogger is known by an icon. A while back, they had a post on characters remaining for new "bees", and I instantly knew what I would be...Miss Pug (after my dear furbaby)!


Saturday, December 26, 2009

Hair and Makeup Trial - Fail

I had my hair and makeup trial today.  I haven't been too worried about it because I've had my hair done for prom and make-up randomly done at make-up counters and always loved the results.  I gathered some inspiration pictures, pictures of my dress, and my veil, and headed to get beautified.  Here's a picture of me before the trial.


We started with the hair.  As a reminder, here is the inspiration style we were going for:


 Loose, but not too messy.   Not too big or too perfect.

I sat anxiously as my stylist curled my hair and carefully pinned here and there.  When she finally turned me around, here is what I saw:


My face kind-of fell when I saw it.  It wasn't what I had pictured, but I couldn't really put into words what I didn't like about it.  I thought I didn't like the pinned loops at the top, so I asked to see what it would look like with just loose curls.


Still not the look I was going for.  I pointed to my inspiration picture again and asked her to try pinning it up again.  As she worked I kept praying and hoping that I would be elated when she turned me around to evaluate her work.  Here's what she came up with:


Still not exactly what I wanted, but I was having a really hard time explaining my vision and was getting a little frustrated.  I figured this was the closest I would get, so I decided to just move on.  Here is a picture with the veil above the hairstyle:


And here is a picture with the veil under the hairstyle.  This option allows you to see the hair more and would look nice with flowers on the side.


I was still toying with the idea of having a down-do with loose curls, so my stylist was nice enough to show me what this would look like.


Next we moved on to make-up.  I was really excited about the airbrushed make-up and the flawless, porcelain complexion it would produce.  Here is my make-up inspiration picture that I provided my stylist:


I wanted emphasis on the eyes.  A little smokey, but still natural-looking.  Here is my finished look:


I was disappointed with this look.  Perhaps I was disappointed that I didn't look like Katherine McPhee, but I didn't feel like I looked like myself either.  Looking back at the pictures, I almost like my "before" picture without any make-up on better.  I ended up going home and wiping off some of the blush, and it looked a little better.  When I saw my MOH that night, she agreed that it wasn't the best look for me.

I'm a little torn right now about whether to try another vendor or to try to figure out how to pin-point exactly what I want done differently and hope that it comes out right on the big day.  This vendor was so sweet and accommodating, and I am horrible with having to say no or turning anyone down.  It would be easier for me to just go with her and hope everything turns out, but I know I would regret it on the big day if I wasn't happy with the results.

What would you do?  Any suggestions or tips?

Thursday, December 24, 2009

And There Goes the Budget...

My plan to stick to a budget is out the window.  There is still hope depending on our headcount, but Mr. Pug and I have made the decision to indulge a bit.  When we first started planning, I knew the $5/seat chair covers would never fit into our budget.  We are expecting about 250 guests, so that would easily be over $1,200.  To cover a chair!  I had pushed the idea to the back of my mind and tried to convince myself that it would be crazy to get them.

Well, on our latest trip to our venue, we were waiting to speak to the catering manager, and Mr. Pug started flipping through a photobook with before and after pictures of the reception room.  Before chair covers and after.  "Wow!  It makes a big difference!" he exclaimed.  He didn't have to tell me twice.  I still didn't think it was realistic, so I agreed but dismissed it.  When we got home that night, though, he was still thinking about the chair covers.  I told him there was a website I had seen where we could get it a little cheaper.  He urged me to do some research and see if we could make it work.


I emailed Chair Covers Express and scheduled an appointment to visit their showroom.  Like almost everything, the prices in Hawaii are higher than what is stated on their website (*sigh*), but still cheaper than other places I had seen.  At the showroom, we looked at the white polyester chair cover ($2.30/each) and the white satin chair cover ($3.00/each).  They had all the organza ($0.70/each) and satin ($1.00/each) sashes lined up.  Set-up costs $1.00/chair or we could do it ourselves.  I had wanted to visit the showroom not only to see the materials and colors in person, but to see how easy (or hard) it would be to set-up ourselves.  We practiced throwing the cover over the chair and tying the sash.  Mr. Pug and I liked the combination of the white polyester chair cover with the grape sash.


I talked to Mr. Pug that night, showed him our budget, and asked him what he wanted to do.  We were right at the max of our budget, and this would be "the straw that broke the camel's back."  Our conversation went something like this:

Mr. P: Wow!  We're spending that much on the wedding?!?!  (Mr. Pug had previously been somewhat detached from the financial aspects of the wedding)

Me: Yeah...this stuff adds up!

Mr. P: Let's get the chair covers.

Me: Even if it puts us over budget?

Mr. P: It makes the whole room look more elegant.  This is a once a life time thing...we want it to be nice!

I've always been the one to pull in the reigns when it comes to spending money, but I thought it was really cute that Mr. Pug wanted the wedding to be "elegant" and "nice".  I think he is really getting into this wedding planning thing!  We went ahead and splurged on the chair covers.  Although I'm a little disappointed about going over-budget, Mr. Pug is happy, and so am I  :)

Wednesday, December 23, 2009

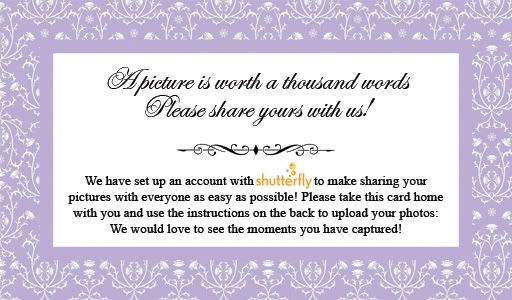
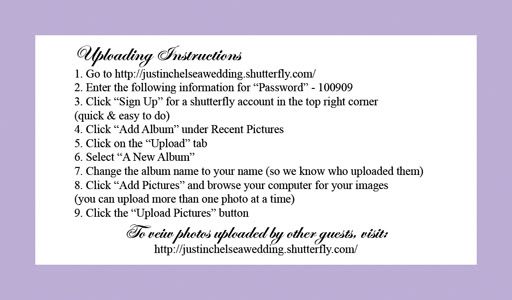
Photosharing Sites

When I first got engaged I had wanted to do the disposable cameras on each table to be sure that I got candids and other pictures that our photographer might miss. I'm a scrapbooker, so I looove photos and wanted to get as many different shots as I could. After some thought and discussions with past brides, I decided against this because:

1) The cost of the cameras and developing film
2) The quality of pictures you get with disposable cameras is not that great
3) People may not use the cameras or may leave half a roll unshot
4) Most people will have their own high-quality digital camera (and let's face it...digital is the way to go these days)

I saw some knottie bios where brides created "photosharing cards" and encouraged guests to upload the pictures from their cameras on a photosharing site.


I love this idea, but I am still not sure where to host the pictures.  Here is my wishlist for the site:

1) Allows easy download of all images at full-resolution
2) Large/unlimited capacity
3) Easy to use
4) Does not require users to create an account or download any software

I've done a bit of research, but I'm still not sure which photosharing site to go with. The front runners are Flikr, Picasa, Shutterfly, SmugMug, and MobileMe Gallery.


Flikr has a Pro service for $24.95/year which would allow unlimited uploads and the ability to download images at full-resolution.  Many people use and are familiar with flikr, but personally, I find it confusing and haven't quite figured out how to organize and manage my photos.  Collections, sets, groups, galleries...what's the difference???  I know I could easily learn, but I am too lazy.  I need something a little more intuitive, especially for my non-techie friends and family.


Picasa is a free option with a web interface as well as a program you can download onto your computer for more features.  I like it because it is a part of the Google suite of products and many of my friends and family already have Gmail accounts.  I know a few of my friends also regularly use the Picasa albums for their personal pictures.  One thing I don't like about the Picasa site is that in order to download a full album of pictures, you will need to install the Picasa software on your computer.  I have this software on my computer, but when I've tried downloading albums, it has been slow and often times I get errors and incomplete downloads.


Shutterfly has a share site feature that I really like because it will allow me to create a nice, personalized page for my guests to use.  I can add notes, stories, a blog, and photobooks to the page to make it more than just a repository for photos.  I also like it because I use shutterfly a lot whenever I want to print photos and create photobooks -- having the photos hosted on this site will save me the trouble of downloading from one site and uploading on another one to make prints.  The downside is that you will need a shutterfly account to download images and they will not be at full-resolution.  In addition, each photo will need to be downloaded individually -- there is no batch downloading feature available.


Smugmug is not a free service, but one that I've noticed a lot of professionals and serious photographers use.  There is a yearly fee ranging from $40-$150/year depending on the features you want.  Smugmug offers more options to view and share your pictures (like password-protected albums and the ability to disable downloads).  They also allow full-resolution downloads, but you will need to download each one individually.  There are third-party applications that allow you to do bulk downloads, but it looks a little confusing.


MobileMe Gallery is a program I just heard of while doing my research.  It is actually part of the MobileMe software package sold by Apple for their Macs.  We just bought a Mac a couple months ago with the intention of using it to create a slideshow for the wedding using the iPhoto software.  Well, now that we have the Mac, this is a new option that is open to me.  The software is actually quite expensive ($99/year) and it was really designed to wirelessly sync your computers and iPhone easily.  The Gallery feature seamlessly interacts with iPhoto and provides easy uploads from your computer.  Friends and family can easily access your albums on the web and can upload and download full-resolution pictures and albums without having to download any software.  They don't need to create a user account either.  You can password-protect your albums, but it is a little tricky because it must be done by creating the album in iPhoto.  This is a software I haven't heard a lot about or had a lot of experience with yet, so I'm still undecided on it.  I downloaded a trial version of the software and will try it out to see how it works.

Anyone have any suggestions or experience with any of these programs?

Tuesday, December 15, 2009

I <3 Etsy!

I first heard of Etsy a couple years ago when searching for some Christmas gift ideas.  The site is a marketplace for people to sell their hand-crafted items.  There's a great variety of items and styles to fit anyone's preferences.  Anything from a silver necklace to a stuffed colon can be found on the website.   It's no surprise that this is also a great site for some unique Wedding items.

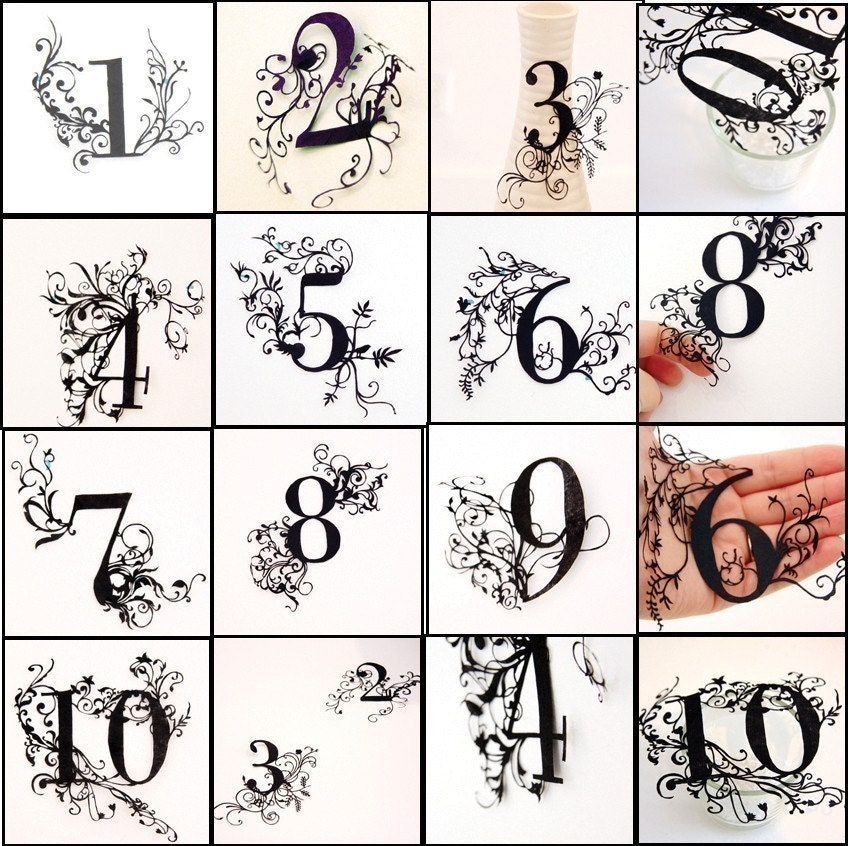
My first Etsy purchase was from papercutdiecut.  I'm planning to frame these handcut numbers and use them for my table numbers.  I just got these in the mail last week...now I just need to find simple, black frames to showcase them in.

Sunday, December 13, 2009

Shoes, Shoes, Shoes (Yes, I Have 3 Pairs)


I have been debating for a while now...classic ivory shoes or trendy colored shoes. Well, thanks to my wonderful MOH, I have both! I found a pair of dyeables at David's Bridal, but couldn't decide which color to dye it (Did I mention what a bad decision maker I am?). While I was floundering with this decision, MOH took matters into her own hands, told the sales girl I'd take 2 -- one in ivory, and one in sangria -- then paid for it before I could change my mind. Simple answer to my indecision and who what woman can't use more shoes?! I'm excited to wear the sangria shoes again post-wedding with a pair of cute jeans.

When I got home, I ordered my third pair of shoes (comfy flip-flops) just in case my feet don't last too long in the sandals. I absolutely love Cobian slippers and already have 2 pairs in black and brown. For my white, "wedding" slippers, I decided to go with the higher heel. If I have enough time, I may attempt adding my own rhinestones to the band.

Also, since my wedding is in a garden in February, there is a chance that the ground may be wet and soft. I searched for Sole Mates to put on my heels to avoid sinking into the ground. I haven't had any experience with them before, but hope they work! 


How many pairs of shoes did you get for your wedding day?

Saturday, December 12, 2009

Miss/Ms./Mrs.? Manners

I am a perfectionist and a stickler for rules.  I am the one who will read all the rules of a board game and call you on it if you aren't doing something correctly.  I am the one who will sit down and actually read through company policies and procedures.  That is why it was so difficult for me address my invitations.  I searched online for proper etiquette but got conflicting information everywhere I looked.  For example, for an unmarried couple living together, I found three different "correct ways" to address the invitation: 1) Woman first, 2) Alphabetically by last name, and 3) Person you know better first.  What is a rule-follower to do when the rules aren't clear?!  Well, I decided to make my own rules.  I still want to be "proper" but decided that modern etiquette has changed a bit from the stiff, formal traditions of the past.  Here are some of my more "rebellious' decisions.

On the outer envelopes, I strayed a bit from the etiquette that states that envelopes should be hand-written in cursive or calligraphied.  Labels were definitely a no-no for me, but with my ugly handwriting and all the beautiful fonts out there these days, I decided to print my envelopes.  I considered fauxlligrahy, but with so much other stuff going on, I actually forgot about it until the invites were in the mail.


When it came to addressing the invites, I made sure to spell out all street names and states.  This got excessively long when I had to write "457 Northeast One Hundred Thirty-Seventh Avenue, Apartment 4B" instead of "457 NE 137th Avenue #4B".  On a side note, this actually caused some friction with my favorite postman (aka Dad) because it conflicts with the USPS guidelines on addressing envelopes.  Did you know that you're not supposed to put a comma between the city and state abbreviation?  I didn't...something to keep in mind for my non-wedding invitation correspondence.

I also researched the proper use of Miss, Ms., and Mrs., particularly in cases of divorced women, widows, and married women who kept their last name.  The rules were not always clear here either, but here is the simple rules I followed:

Miss - I did not use this title, which is generally reserved for young girls.  Young girls are not listed on the outer envelope, and since I was doing informal inner envelopes, there was no need to use the title.

Mrs. - I only used this title when a woman was currently married and took the name of her husband (in which case the envelope was addressed to Mr. and Mrs. John Doe), or when a woman was widowed and never remarried (Mrs. Jane Doe).

Ms. - I used this title in all other situations -- single women, divorced women (whether they kept their married name or reverted to their maiden name), married women who kept their maiden name, married women who hyphenated their name, and women who's status I was unsure of.

In my research, it seems to depend on the region or culture you grew up in.  Some women prefer to be called "Mrs." if they are married, regardless of their last name.  Others find it sexist to be called Mrs. John Doe.  Others feel that the term Ms. refers to a spinster with nine cats who never got married.  Personally, I would be fine being called Ms., so I went with that.  I am probably over-thinking the whole issue and doubt many of my guests would even pay attention to this detail.


For the inner envelopes, I decided to address guests casually because it sounds more personal to me.  I feel weird addressing my little brother as "Mr. Smith" when I would never call him that in real life (except maybe in a sarcastic tone).  So my inner envelopes had first names for friends and familial titles (i.e. Aunty Jane, Grandma, Uncle Bob) for relatives.

On the RSVP cards, I indicated the number of seats that had been reserved for the party.  I know this is supposed to be dictated by the inner envelope, but I think a lot of people just aren't familiar with proper etiquette and may overlook this.  For example, the inner envelope may just say John, but John might not know that this means a guest is not invited.  I also avoided using phrases like "accepts with pleasure" and "declines with regret".  Who am I to assume a guest is accepting with joy or declining with regret.  A minor issue, but a "rule" I decided to follow.  If you want to get really technical, I also read that a "proper" RSVP is a note from the invitee, not checking off boxes.  I decided not to go this route, because if I sent a blank RSVP card, I doubt many people would know what to do with it.

Overall, I did what made the most sense to me.  From my research online, it seems clear that there are not many people who really know what the proper etiquette is, and even less that actually care.  I learned a lot in the process and feel satisfied with what I did.  Are you concerned with proper etiquette, or did you stray from the rules?

Friday, December 11, 2009

I Love Early RSVPers!

Okay, I admit it.  I am one of those dreaded people that wait until the last minute to RSVP to an invitation.  Even if I know what my response is, there is something in my mind that thinks it is too difficult to check a box and find a mailbox for the stamped, self-addressed envelope.  I guess I figured that if they asked for a response by December 31, there was no need to respond any earlier.  Now that I am the one trying to plan an event, that has changed...I vow never to wait until the last-minute to RSVP (or worse yet, RSVP late or not at all)!

It's only been three days since we sent out our invitations, and I've already received ten RSVPs!  Each one I receive feels like a step closer to the big day.  It's so exciting!

Thursday, December 10, 2009

Invitation Feedback


Our guests have started receiving our invitations, and we've received a lot of compliments.  The greatest compliments are probably the ones from people who that thought we got it done professionally and didn't believe that we had done it all ourselves.  It makes all the hard work worth it, and Mr. Pug is so proud of us.

Wednesday, December 9, 2009

Signed, Sealed, Delivered!

After months of planning the design, hours of printing, days of assembling, and double-triple-quadruple checking the guestlist, our invitations are finally complete!  We were aiming to send out invites the first week of December to beat the holiday rush.  We're a little behind schedule, but not bad overall.

Now let me preface this by saying that I am a huge dork.  My dad works at the post office, and he could have easily taken it in to drop it off for me, BUT I just had to get a picture of myself at the post office with the invitations.


In fact, the picture you see of me dropping the invitations in the mail slot is posed and I never actually dropped them in.


You see, being the anal detail-oriented bride that I am, I wanted to get my invitations hand-canceled to avoid the ugly bar codes on the envelopes and lessen the risk of being mangled by a machine.


I consulted with my own personal postman and he was able to get my invitations hand-canceled for me.  Here I am at the post office handing off my invitations to my favorite postman.


They are out of my hands now, and I can cross off a huge item on my checklist.  Now I just need to wait for the RSVPs to come rolling in!

Tuesday, December 8, 2009

An Imposter!

I logged onto the Weddingbee website today, and what did I find???


The Pug icon has been adpoted!!! I immediately went searching for her first post where she introduced herself to see if she is anything like moi. Well, turns out she is Asian, loves horrible TV shows (i.e. Girls Next Door), and (most importantly) has a little puggie just like me! She even describes herself as a "big dork"...sounding more and more like me every sentence! I guess she is worthy of the "Miss Pug" name...let's just hope I don't let us down...

Sunday, December 6, 2009

Invitation Photo Shoot

The invitations are complete!  They were a lot of work, and I'm not sure if they really came out that much cheaper than if I were to purchase them.  I do feel quite accomplished, though, and I am eager to show them off!

 I bought most of my paper from Paper and More.  I am extremely happy with the quality of their paper, the speed of delivery, and their excellent customer service.  I had received a set of pockets that got damaged in the mail.  When I wrote to them to explain what happened, they immediately (seriously, within 10 minutes after I sent the email) apologized and had another set of pockets being sent to me free-of-charge.  I highly recommend them.

Except where noted, everything was handcut using a paper cutter (I had about 10 different cutters on hand and experimented to see which worked best).  Everything was matted down using 5mm acid-free double-stick tape from Heiko.  I used about 5 rolls to create 200 invitations.
 

The Outer Envelope

The outer envelopes were a last-minute purchase I made when I was deciding how to address my invitations.  Originally, I had planned to just use one envelope and include a belly band with the guests names printed on them.  In my current design, however, this didn't work.  In order to clarify who was invited, I decided to use both an inner and outer envelope.  I also wanted to protect my beautiful metallic inner envelope from damage in the mail.  It was a little difficult to find envelopes the right size - 7.5" x 5.5".  It is sometimes called A7.5 envelopes, as it is designed to fit 7.25" x 5.25" A7 envelopes.  I found these white linen envelopes on Paper Presentation for a great price.  I printed them on a home laser printer, and they turned out great.  The font I used is called Feel Script.  I used my new Hand Embosser to emboss the return address on the back flap.

The Inner Envelope

I really liked the sample White Metallic Linen envelopes I had ordered from Paper & More ($0.28 each), but Cards & Pockets has recently started selling metallic euro-flap envelopes, and they were a great price ($0.17 each).  I decided to save some money and go with the envelopes from Cards & Pockets.  I printed them on a home laser printer, and they turned out great.  The font I used is called Feel Script.

Envelope Liner and Pocketfold

The envelope liners were designed using a digital stamp I created in Photoshop.  I literally laid out each individual flourish to cover a letter-sized paper.  I used a laser printer to print the design onto Metallic Linen Text paper.  The difficult part was that I had to print each sheet individually.  If I tried printing multiple copies at one time, the printer was not able to properly feed the paper because it was a little slippery.  I bought an envelope liner set from Paper-Source, but it did not work with the envelopes I bought.  I created my own template from a manila folder, then traced the shape on the back of each sheet of printed paper.  I hand-cut each liner using a scissors.  These babies were perhaps the most labor-intensive, but adds so much to the invitation.  They were definitely worth it!

Close-up of the Monogram

I knew the small squares would be difficult to cut precisely, so I ordered pre-cut cardstock squares from Cards and Pockets.  The price was reasonable, it saved me a lot of time, and the cuts were precise.  I cut the white squares myself after printing the monograms on letter paper (I fit the monograms onto the same sheets with the invitations and maps -- see below).  This was a bit difficult, and I ended up with some crooked cuts.  Luckily, I had a bunch of extra, so I was able to just pick the best and toss the rest.

The Invitation

Here is what I used to make the invitation you see above (all paper is from Paper and More):

- 5"x7" Bronze Pocketfold
I actually preferred the Bronze color at Cards and Pockets, but the pockets from Paper and More were cheaper and had a wider pocket.  The color difference was slight.

- 4.75" x 6.75" Purple Punch Text Paper
I was initially going to cut this myself from a letter-sized paper, but for a small price, Paper and More was able to do it more quickly and greater precision.  Also, if they happened to make a mistake, they would have to replace the paper.  The $5 I paid to have them do it was well worth it.

- 4.5" x 6.5" Metallic Linen Text Paper
I did cut this myself because it was easier to print as whole sheets, and I was able to squeeze 2 invitations and 9 monograms onto one sheet of paper to utilize as much of it as I could.  I was lucky enough to have access to a commercial Xerox printer to print my invitations.  I had gone a week earlier to do a test-run and verify that 1) the printer could handle my paper, and 2) that the ink would stick on my metallic linen paper.  Once the invitation was printed and cut, I used a Fresh Impressions paper punch to create the flower and stuck a 3mm clear rhinestone sticker in the center.

- 4" x 6.75" Metallic Linen Cardstock
I cut this myself also, as I printed 2 maps and 4 monograms on a page.  I also laid out the paper so that I would have a 1.25" x 11" blank strip that I would use for the belly bands.

- 5.25" x 4" Metallic Linen Cardstock
I was able to fit 4 RSVP postcards on one sheet of paper.  The USPS requirements for a postcard are that they be 5" x 3.5" x 0.007" at a minimum and 6" x 4.25" x .016" at a maximum.  In addition, the length to width aspect ratio must be between 1.3 and 2.5.  This was one of the most difficult items to cut because my printer was not capable of bleed printing (or I did not know how to do it), so it left a white border around the page.  Also, the RSVP cards needed to be printed front and back.  I did all the fronts then all the backs because the duplexer kept jamming with the slippery metallic cardstock.

The Map

Since many of my guests are local and familiar with the island, I didn't think it was necessary to include a map of how to get to the hotel.  Instead, I created a hotel map to help guests find the ceremony and reception locations once they get to the hotel.  I hand-drew the map in Power Point and laid out the card in Photoshop.

The Front of the RSVP Card

The front of the RSVP card is visible in the pocket when you open up the invitation.  Unfortunately, the only post card stamp the US Postal Service currently has is a blue polar bear.  It doesn't really match my tropical theme, but it will have to do.  I didn't want to design my own stamp because of the cost.  I had chosen to go with the RSVP postcard specifically for budget reasons.

The Back of the RSVP Card

Although it may not be proper etiquette, we decided to include a line that indicates how many seats are reserved for each party.  While we used the inner envelopes to spell out exactly who was invited, we wanted to be clear, especially because our number of invited guests already exceeded the venue's capacity.

UV Pen Numbering of RSVPs

Because guests sometimes forget to write their names on the RSVP card, it is a good idea to number your cards so that when you get a response with no name, you are able to track down the guest it belongs to.  We took it a step further by ordering a UV Light Pen to write the numbers in invisible ink.

Whew!  A lot of work, but I'm quite proud of them.  I was also very lucky to have the help of Mama Pug, Uncle Pug, my maid of honor, her boyfriend, and of course, Mr. Pug.  I couldn't have done it without them!

Saturday, December 5, 2009

Wedding Shower #1

I am very blessed and had quite a few people tell me they wanted to throw me a shower when they heard I was engaged.  This allowed me to have several small showers rather than one big one.  I opted for this because it would make the shower less of a financial burden for the host, and I would be able to spend more time with each of the guests.  Plus I hate being the center of attention...although, I don't quite know which is worse -- being the BIG center of attention once or being a smaller center of attention four times.

Tonight Mr. Pug's cousin threw me a shower at Pearl Country Club with all of Mr. Pug's family.  I hadn't met his whole family before, so it was good to finally meet all of them.  Men were included in this shower, and I'm glad Mr. Pug was there with me to keep me company and shoulder some of the attention.

We ate dinner, played games, and opened presents.  Cousin Pug did a great job organizing and incorporated a lot of little details like orchids (the "theme" of our wedding), fortune cookies with personalized fortunes, and a delicious lemon crunch cake.  We left with a carload of gifts and lots of food to take home.  Mr. Pug and I are so lucky to have such thoughtful and generous family!


Tuesday, November 17, 2009

A Second Chance

Remember my dress dilemma?  Mr. Pug gave me permission to go dress shopping and try on other dresses.  David's Bridal recently opened it's first store in Hawaii, so we ventured over on a whim to see if they could fit us in.  When we got there, we registered at the front desk and our sales consultant, Daisy, came to get an idea of what we were looking for.  I told her strapless mermaid, no preference on color.  We gathered 3 dresses to try on, picked out some shoes, and she brought me some undergarments to use.

The first dress was a white trumpet style gown that I had liked on the website:

 I didn't care for the way the bottom flared out, and it just looked a little "messy".

Dress 2 was a satin ivory gown:


It felt a little plain, but I did like the ivory color better than the harsh white from the first dress.  Daisy agreed and thought that I would really like dress number 3 because it combined the elements I liked from the two dresses.

Dress number three is an ivory satin mermaid gown with a little beading at the neckline:


Daisy was right!  I loved it.  The dress somehow gave me a waist and the material was so soft.  It was comfy, and most importantly, I felt beautiful!  Mr. Pug liked it too!  I walked around in the store with it on for a bit deciding if I should take the plunge.  At this point Mr. Pug was all for it...there was just one problem...the week was less than 13 weeks away.  Ordering a dress in my size would take 12-15 weeks.  Daisy thought there might be a possibility it would come in earlier, but we didn't really want to take that chance.  She made a few phone calls to see when they could get it in.  February 7th...one day after the wedding.  I was bummed.  Daisy checked the computers to see if other stores had the dress in my size on the racks.  All petite dresses are special ordered, so I would have to get the regular size and have it hemmed.  The other downside is that it would cost $105 to get it shipped to the Hawaii store.  I was already over my dress budget (since I bought the first dress), so this new dress plus shipping plus alterations would be too much.  Then I got an idea...I asked which stores had the dress in my size, and one happened to be in Oregon near my brother's house.  I made the phone call to my brother to see if he could run down to the store, Daisy called the store to relay the information to them, and I called my mom to see if she could pick up my dress on her next flight to Oregon.  Half an hour later, I had purchased the dress (no tax -- bonus!) and just had to be patient while I waited for it to come home.  How exciting!  I never teared up or got "that feeling," but I love the dress and can't wait to wear it for the wedding.

Sunday, November 15, 2009

Registering Blues

When it comes to registering, I had a picture in my head of a happy, trigger-happy couple prancing around a store with a scan gun in hand merrily pointing it at anything and everything that me their fancy.  I searched online for a picture but came up short...really, I have no idea where this picture in my head came from.  Must have been a movie.  Anyways, that pretty picture in my head is soooo not what registering was like for me and Mr. Pug.

First of all, we currently live together and have all the basics.  Granted, they are not the best quality and we usually eat out of paper plates and use plastic forks, but that is mostly by choice (I am too lazy to wash dishes).  I would love to upgrade our dinnerware, silverware, drinkware, appliances, etc. BUT, we are currently renting a tiny duplex, and we barely have enough room for what we currently own.  If only I could delay my registering until the day we find a house to buy...

So, we considered not registering.  Mr. Pug actually thought only mainland people registered, not people in Hawaii.  While it's true that Hawaii people generally give money for weddings, I knew that there would be some guests who might not feel comfortable with that and others that would want to buy actual things for the shower.  So, if people were going to buy things anyway, I might as well let them know what we would like, right?  So I decided to register for at least a few things for those who might be looking to buy us a gift.

 My first problem was deciding where to register.  This issue is a little harder in Hawaii because many of the big chains (Crate & Barrel, Pottery Barn, Bed Bath and Beyond, etc.) do not have stores here.

We just got a Target a few months ago, and since I love Target, I thought it would be perfect!  But then I heard that returning items is difficult there, especially if you don't have a receipt.  Now, I wouldn't necessarily return things that I asked for on my registry, but what if I happen to get multiples with no gift receipt.  To return an item at Target without a receipt, you must exchange it for a single item of equal or greater value in the same department that the item you are returning came from.  On top of that, they take all your personal information and limit you to doing this once or twice a year.  I love Target, but that just sounds like too much of a hassle.

My next choice would be Crate & Barrel or Bed Bath and Beyond, but since there are not physical stores in the state, it may be difficult for guests, especially those who don't feel comfortable buying things online.  Shipping to Hawaii is also expensive.

The only other on-island places I could think of were Macy's and Williams-Sonoma.  Williams-Sonoma seemed too pricey and I just wasn't thrilled about Macy's.  I really wish Costco had a registry because I saw a lot of things I wouldn't mind getting there :)

Right now I'm still undecided about whether or not to register.  Did you register?  Where?  Was it everything you dreamed it to be?